Tuesday, December 13, 2016

Storm Tracking

/\/\/\/\/\/\/\/\/\/\/\/\/\/\/\/\/\/\/\/\/\/\/\/\/\/\/\/\/\/\/\/\/\/\/\/\/\/\/\/\/\/\/\/\/\/\/\/\/\/\/\/\/\/\/\/\/\/\/\/\/\/\/\/\/\/\/\/\/\/\/\/\
Hello again! This post will be a bit different from any other post. I'm talking about storms! I tracked this storm about a month ago, but it was a cool storm. It was changing position and shape every day!
Here is a picture.

Go left to right, from the top to the bottom for the exact order.

The storm's top speed was 84 km/h(Kilometers per hour) on November 15th. Then it began to slow down as it approached land. It disappeared on November 18th.
Here is the route.


Here is the first route. The numbers represent the day I tracked it.
 I tried my best not to make it blurry.


This is sort of a estimation of the route. It was moving inland towards Washington and away from the
Aleutian Islands of Alaska. The storm traveled pretty far too!
/\/\/\/\/\/\/\/\/\/\/\/\/\/\/\/\/\/\/\/\/\/\/\/\/\/\/\/\/\/\/\/\/\/\/\/\/\/\/\/\/\/\/\/\/\/\/\/\/\/\/\/\/\/\/\/\/\/\/\/\/\/\/\/\/\/\/\/\/\/\/\/\

Friday, December 9, 2016

Remember the Memory Game?

/\/\/\/\/\/\/\/\/\/\/\/\/\/\/\/\/\/\/\/\/\/\/\/\/\/\/\/\/\/\/\/\/\/\/\/\/\/\/\/\/\/\/\/\/\/\/\/\/\/\/\/\/\/\/\/\/\/\/\/\/\/\/\/\/\/\/\/\/\/\/\/\/\
こんにちは! That means "Hello!" in Japanese. In this post, there will be a speed video for my memory game! I'll also have some snips to show.


 There are 23 variables used in the program. Let's talk about one of my favorites, speedFactor.The speedFactor variable would be in a loop that made the LED's go faster after a level, if I changed it by 5, that part of the loop would be effected. Here is an example, say I wanted to teleport to a certain village in Minecraft. If I wanted to do that, I would put in coordinates for the X, Y,  and Z position. Changing 1 position by a certain number would effect where I would end up.

EXERCISES AND RESULTS
~~~~~~~~~~~~~~~~~~~~~~~~~~
For the first problem, I had to figure out how to speed up the first level.
 Result: I used the speedFactor variable. When I changed it by 5, it was a bit faster. I changed it by 5 again, and it was even faster!(I found the game a bit easier when it was really fast.)

The second one was about changing the tones of the buzzer.
Result: Me shouting at the computer saying "THE BUZZER DOESN'T MAKE ANY SOUND!!!!!!!" I checked the program and everything was good, but it might just be a hardware problem.

For the final one, I needed to make the LED's blink 3 times if I lost the level.
Result: I couldn't make it blink 3 times, but I made it blink 2 or 4 times.

I had a bonus hardware problem, but AGAIN, it had something to do with the buzzer. It took me a bit to finish these problems, but I pulled through.

I hope you enjoyed this post. Please like and comment! I'll see you in the next unboxing video. Bye guys!
/\/\/\/\/\/\/\/\/\/\/\/\/\/\/\/\/\/\/\/\/\/\/\/\/\/\/\/\/\/\/\/\/\/\/\/\/\/\/\/\/\/\/\/\/\/\/\/\/\/\/\/\/\/\/\/\/\/\/\/\/\/\/\/\/\/\/\/\/\/\/\/\/\

Wednesday, November 30, 2016

2nd Create Crate Unboxing

/\/\/\/\/\/\/\/\/\/\/\/\/\/\/\/\/\/\/\/\/\/\/\/\/\/\/\/\/\/\/\/\/\/\/\/\/\/\/\/\/\/\/\/\/\/\/\/\/\/\/\/\/\/\/\/\/\/\/\/\/\/\/\/\/\/\/\/\/\/\/\/\/\
Hey guys! It has been FOREVER since I've uploaded a post. This video was made a while ago, and I need to catch up with my blog. Please enjoy!


/\/\/\/\/\/\/\/\/\/\/\/\/\/\/\/\/\/\/\/\/\/\/\/\/\/\/\/\/\/\/\/\/\/\/\/\/\/\/\/\/\/\/\/\/\/\/\/\/\/\/\/\/\/\/\/\/\/\/\/\/\/\/\/\/\/\/\/\/\/\/\/\/\

Thursday, November 10, 2016

My Moody Mood Lamp

/\/\/\/\/\/\/\/\/\/\/\/\/\/\/\/\/\/\/\/\/\/\/\/\/\/\/\/\/\/\/\/\/\/\/\/\/\/\/\/\/\/\/\/\/\/\/\/\/\/\/\/\/\/\/\/\/\/\/\/\/\/\/\/\/\/\/\/\/\/\/\/\/\
Hey guys! In this post, I'll be talking about my hardware and it's program. There will also be a pop quiz near the end of the post. I didn't have a video for making the hardware, so I'll have to explain it with pictures.
Hardware with lantern.
Diagram of the circuit.


Finished hardware.

HOW THE PROGRAM WORKS
~~~~~~~~~~~~~~~~~~~~~~~~~~~~~~~~
 The program is way too complicated to explain entirely. There are little bits of writing that describe the program. They are called "comments." If you want to make a comment, you use "//" at the beginning, like "// This is a message." Another way of making a comment is using "/**/" like this, "/*This is another message.*/" If a user were to open up a game's code, there might be comments in the program. If they were to make a mod for the game, the comments would help them with different lines of code!

If you are a fellow programmer, you would know what a variable is. A variable is used in a program to store information, like a container. If there were no variables, it would be a lot harder changing the numbers in the program.

Here is a picture of some of the code. The three variables in the circle represent the LED's. The variable "int power," controls how bright the LED's are.


WHAT ARE TIE POINTS?
~~~~~~~~~~~~~~~~~~~~~~~
The tie points are used to connect with the wires, LED's, etc. The breadboard has 830 tie points. If you saw the diagram for the circuit, all of the wires are connected with LED's and UNO R3. When the program was finished, I found out that the circuit can only work when it's connected to the computer. It was dark when it was on, so the lights were kind of bright.

 Anyway, here are some pictures of the program working.


POP QUIZ
????????????

1. What kind of software did I use for the program?
a. Arduino     b. Python
c. SQL     d. HTML

2. What wires were used in the hardware?
a. Jumper wires     b. U-shaped Jumper wires
c. a and b     d. None of the above

3. What were the comments for?
a. YouTube of course!     b. Describing the program
c. What comments?     d. None of the above

4. How many tie-points were on the breadboard?
a. 340     b.670
c. 830     d.1200

/\/\/\/\/\/\/\/\/\/\/\/\/\/\/\/\/\/\/\/\/\/\/\/\/\/\/\/\/\/\/\/\/\/\/\/\/\/\/\/\/\/\/\/\/\/\/\/\/\/\/\/\/\/\/\/\/\/\/\/\/\/\/\/\/\/\/\/\/\/\/\/\/\

I hope you enjoyed the post. Please leave a like. I shall see you in the next post. Bye guys!

P. S. If you took the quiz, comment your answer. I will tell if you are correct in the next post.
/\/\/\/\/\/\/\/\/\/\/\/\/\/\/\/\/\/\/\/\/\/\/\/\/\/\/\/\/\/\/\/\/\/\/\/\/\/\/\/\/\/\/\/\/\/\/\/\/\/\/\/\/\/\/\/\/\/\/\/\/\/\/\/\/\/\/\/\/\/\/\/\/\

Monday, October 3, 2016

First Creation Crate

/\/\/\/\/\/\/\/\/\/\/\/\/\/\/\/\/\/\/\/\/\/\/\/\/\/\/\/\/\/\/\/\/\/\/\/\/\/\/\/\/\/\/\/\/\/\/\/\/\/\/\/\/\/\/\/\/\/\/\/\/\/\/\/\/\/\/\/\/\/\/\/\/\
Hey guys! I hope you enjoy the video! I had fun recording this!


/\/\/\/\/\/\/\/\/\/\/\/\/\/\/\/\/\/\/\/\/\/\/\/\/\/\/\/\/\/\/\/\/\/\/\/\/\/\/\/\/\/\/\/\/\/\/\/\/\/\/\/\/\/\/\/\/\/\/\/\/\/\/\/\/\/\/\/\/\/\/\/\/\

Monday, September 26, 2016

Racing to the Finish! : Part 2

/\/\/\/\/\/\/\/\/\/\/\/\/\/\/\/\/\/\/\/\/\/\/\/\/\/\/\/\/\/\/\/\/\/\/\/\/\/\/\/\/\/\/\/\/\/\/\/\/\/\/\/\/\/\/\/\/\/\/\/\/\/\/\/\/\/\/\/\/\/\/\/\/\
Hey guys! In this post, I'll be experimenting a bit more with my race car, and I'll be talking about the fastest cars in the world!

CAR EXPERIMENTS
~~~~~~~~~~~~~~~~~~
Many things can be tinkered with, even cars! There were four experiments, the trick, grip, power, and strength experiment.

I started with tricks. It involved the large wheels, small wheels, and the axle attachment. When I put the parts on, I just had to turn the axle around 3-4 times. The car was moving fast enough to do a wheelie.
If you are wondering how it did that, the answer is Torque. Torque means "Moment of Force." When I added the axle attachment, the car accelerated faster, that gave it a lot of torque. The more torque you have, the more it accelerates. It went so fast, it did a wheelie!
The grip experiment was a weird one. I just needed wax paper, tape, and a measuring tape. First, I measured the wax paper so it could fit on the large wheels. Then I taped them together to put them on the wheels.

 The Tinker-zine said my car wouldn't move. However, my car went further with the wax paper. It had to do with Friction. Friction is a force of motion. It kept my car moving on the road. With the grip strips, there was a lot of friction. When I added the wax paper, there was less friction.


For the power experiment, I only needed my race car and a measuring tape. To start, I turned the rubber band 2 times, and wrote down how far it went. I repeated the steps, but I turned the rubber band 4 times for the second try, and 8 times for the third. For the first try, the car went 22.5 inches. The second, 7ft and 1 inch. For the third, it went as far as the tape could go, up to 25 ft!

How come it moves more when you turn the band more?The more you turn the rubber band, the tighter it gets. That caused the car to go faster when it got released.


The strength challenge was really short. To do this experiment, I needed some batteries, a fruit roll-up box, thread, scissors, and of course, my race car.  I needed to make a sled for the batteries to fit in, so I got the box, and cut it into a sled shape. To drag it behind the car, I got some thread, and poked a hole in the bottom of the sled, and tied the thread to it. Then I tied the other end in one of the slits to attach the sled. For the experiment, I turned the rubber band 1.5 times around the axle. The experiment started out with the sled being empty, the car went 3 ft, 3 inches. I added a AA battery to it, the car went 2 ft, 4.5 inches. When I added a AAA battery, the car only went 1 ft, 2.75 inches. Finally, with one AA and two AAA batteries, it went 1 ft, 2 in.

I tried to add more batteries, but it couldn't move! Race cars have to be made out of light materials like aluminum so they can move fast. If they were heavy, they would move really slow!

FASTEST CARS EVER!!!!
~~~~~~~~~~~~~~~~~~~~~~
These cars can travel at amazing speeds, each one better than the last, all made by the same guy! His name was Richard Noble. The first car he made was the Thrust 1, but he sold it for parts to make the Thrust 2. It can travel up to 633 mph.
Thrust 2
That record would've been great to keep! But he wanted to create something faster, the Thrust SSC. (Super Sonic Car) He broke his own record with the Thrust SSC going 763 mph. The car actually produced a sonic boom!
Thrust SSC
Richard is still planning to go faster, he and his team are making the Bloodhound SSC. It's still a work in progress, but they plan to make it go 1000 mph!! That would be cool right? There are many people trying to break this record, but I bet that Richard is going to beat it first.

Work in Progress Bloodhound SSC.

/\/\/\/\/\/\/\/\/\/\/\/\/\/\/\/\/\/\/\/\/\/\/\/\/\/\/\/\/\/\/\/\/\/\/\/\/\/\/\/\/\/\/\/\/\/\/\/\/\/\/\/\/\/\/\/\/\/\/\/\/\/\/\/\/\/\/\/\/\/\/\/\/\


I hope you enjoyed the post. This may be my final tinker crate post. Please like and comment. I'll see you later. Bye!
/\/\/\/\/\/\/\/\/\/\/\/\/\/\/\/\/\/\/\/\/\/\/\/\/\/\/\/\/\/\/\/\/\/\/\/\/\/\/\/\/\/\/\/\/\/\/\/\/\/\/\/\/\/\/\/\/\/\/\/\/\/\/\/\/\/\/\/\/\/\/\/\/\

Thursday, September 15, 2016

Racing to the Finish! : Part 1

/\/\/\/\/\/\/\/\/\/\/\/\/\/\/\/\/\/\/\/\/\/\/\/\/\/\/\/\/\/\/\/\/\/\/\/\/\/\/\/\/\/\/\/\/\/\/\/\/\/\/\/\/\/\/\/\/\/\/\/\/\/\/\/\/\/\/\/\/\/\/\/\/\
Hey guys! In this post, I have the speed video for my race car, and I'll be doing some upgrades to it.


FAMILY CARS AND RACE CARS
~~~~~~~~~~~~~~~~~~~~~~~~~~~~~
Different cars do different things, but there is a BIG difference with race cars. Family cars don't have to be fast, and they can be pretty heavy, but they can hold a lot of people. With race cars, they have to be light, speedy and aerodynamic. These kinds of cars don't have a lot of space in them, so only one person can fit. Race cars are pretty thirsty cars, only going 2-3 miles a gallon. They also need parachutes to slow them down! Last of all, race cars take years to control the car perfectly, make a wrong move, and you'll go flying!


CAR CHANGES
~~~~~~~~~~~~~~~
As you saw in the video, the race car was moving perfectly, but there is an option to Tinker with the car. There are different wheels to put on, an axle attachment, changing the length of the car, or changing the rubber bands place.


Changing the car makes it move different. For example, the axle attachment makes the car go further. Changing where the rubber bands is also changes how far the car goes. If it's further away from the axle, it wouldn't go as far. But if it was closer, it would go further. I think the length of the car changes how fast it goes, like the axle piece.The wheels are probably for how much drag the car has. When I changed the wheels, it slowed the car down a bit. If you experiment with a car like this, you can make it go fast, fast, FAST!

/\/\/\/\/\/\/\/\/\/\/\/\/\/\/\/\/\/\/\/\/\/\/\/\/\/\/\/\/\/\/\/\/\/\/\/\/\/\/\/\/\/\/\/\/\/\/\/\/\/\/\/\/\/\/\/\/\/\/\/\/\/\/\/\/\/\/\/\/\/\/\/\/\

I really hope you enjoyed the post. Please like and comment. I'll see you in the final part. Bye!!
/\/\/\/\/\/\/\/\/\/\/\/\/\/\/\/\/\/\/\/\/\/\/\/\/\/\/\/\/\/\/\/\/\/\/\/\/\/\/\/\/\/\/\/\/\/\/\/\/\/\/\/\/\/\/\/\/\/\/\/\/\/\/\/\/\/\/\/\/\/\/\/\/\

Friday, August 26, 2016

FINAL TINKER CRATE?!?!?!

/\/\/\/\/\/\/\/\/\/\/\/\/\/\/\/\/\/\/\/\/\/\/\/\/\/\/\/\/\/\/\/\/\/\/\/\/\/\/\/\/\/\/\/\/\/\/\/\/\/\/\/\/\/\/\/\/\/\/\/\/\/\/\/\/\/\/\/\/\/\/\/\/\
Hey guys! Please enjoy the video. Also, please like if you enjoyed the intro.


/\/\/\/\/\/\/\/\/\/\/\/\/\/\/\/\/\/\/\/\/\/\/\/\/\/\/\/\/\/\/\/\/\/\/\/\/\/\/\/\/\/\/\/\/\/\/\/\/\/\/\/\/\/\/\/\/\/\/\/\/\/\/\/\/\/\/\/\/\/\/\/\/\

Tuesday, August 23, 2016

Oil + Water = GROOVY! : Part 2

/\/\/\/\/\/\/\/\/\/\/\/\/\/\/\/\/\/\/\/\/\/\/\/\/\/\/\/\/\/\/\/\/\/\/\/\/\/\/\/\/\/\/\/\/\/\/\/\/\/\/\/\/\/\/\/\/\/\/\/\/\/\/\/\/\/\/\/\/\/\/\/\/\
 Hey again guys! In this post, I will show you how I made my Dense-O-Meter, and I'll also talk about emulsions.

MY DENSE-O-METER
~~~~~~~~~~~~~~~~~~~~
A Dense-O-Meter is a jar full of different types of liquid on top of each other. Whenever you drop a small item in it, it will either float on the top, or sink into a level of liquid. The level it sinks to is how dense the item is. (If you haven't seen the last post, density is the compactness of an item.) If you want to make a Dense-O-Meter, you'll need.....

- A Large Jar or Container
- Honey
-Light Corn Syrup
- Real Maple Syrup (I didn't have this)
- Milk
- Dish Soap
- Water
- Vegetable Oil
- Rubbing Alcohol
 (My Container was too full for the Alcohol)
- Food Coloring (Optional)
- Scotch Tape (Optional)
- Marker (Optional)
- Pipette

Once I got my jar set, I started adding the liquids one at a time. With the honey, corn syrup, and milk, I poured them down the center of the container so the liquids wouldn't mess up the other layers. The soap and water were a challenge. I had to squeeze the soap down the side of the container. The water was colored with food coloring to give some color to the Dense-O-Meter. I used the pipette to squeeze it down the sides so it wouldn't mix with the soap. With the oil, I just poured it down the sides, like the soap.

To test out the Dense-O-Meter, I got a washer, a carrot, and a plastic model of the Eiffel Tower. Here are the pictures of the Dense-O-Meter.
Density Levels

Density Level Labels
 In the pictures, you can see the washer in the honey, and the Eiffel Tower in the corn syrup and milk. Where's the carrot? If you check the dish soap level, you can see a bit of orange. The denser the item, the lower it sinks.


Items for dense-o-meter.
All items in dense-o-meter.
EMULSIONS
~~~~~~~~~~~~
We all know that oil and water don't mix, but how do we have so many things that have oil and water mixed in? The answer, is using an emulsifier. Emulsifiers are like magnets that attract both oil and water, that's how oil and water can mix. We can make certain foods called "Emulsions," like dressings, mayonnaise, and ice cream! They use emulsifiers to mix the oil and water  together. After a while, the oil and water might separate.There are many emulsifiers like egg yolk, tomato paste, Dijon mustard, etc.

/\/\/\/\/\/\/\/\/\/\/\/\/\/\/\/\/\/\/\/\/\/\/\/\/\/\/\/\/\/\/\/\/\/\/\/\/\/\/\/\/\/\/\/\/\/\/\/\/\/\/\/\/\/\/\/\/\/\/\/\/\/\/\/\/\/\/\/\/\/\/\/\/\

I hope you enjoyed the post. In the next post, I will have a new un-boxing video. Bye!
/\/\/\/\/\/\/\/\/\/\/\/\/\/\/\/\/\/\/\/\/\/\/\/\/\/\/\/\/\/\/\/\/\/\/\/\/\/\/\/\/\/\/\/\/\/\/\/\/\/\/\/\/\/\/\/\/\/\/\/\/\/\/\/\/\/\/\/\/\/\/\/\/\

Thursday, August 18, 2016

Oil + Water = GROOVY! : Part 1

/\/\/\/\/\/\/\/\/\/\/\/\/\/\/\/\/\/\/\/\/\/\/\/\/\/\/\/\/\/\/\/\/\/\/\/\/\/\/\/\/\/\/\/\/\/\/\/\/\/\/\/\/\/\/\/\/\/\/\/\/\/\/\/\/\/\/\/\/\/\/\/\/\
 Hey guys! In this post, I have a speed video for my lava lamp for my oil and water tinker crate. I will talk about haw a lava lamp is so groovy. (Yep, that's a question in the tinker-zine.)


WHY IS A LAVA LAMP GROOVY?
~~~~~~~~~~~~~~~~~~~~~~~~~~~~~~~~
Have you wondered why a lava lamp was groovy? If you have, here's my answer. I think it's because oil and water just don't want to mix. If you look at a mixture of oil and water molecules, it looks like the oil molecules don't want to be around the water molecules. AKA, Hydrophobic. Just like the phrase says, "Oil and Water Don't Mix."

 You might be thinking, "How come the water is always on the bottom?" Good question! It's the density of the water. Density is how compact something is. Water is denser than oil. When you use the pump on the lava lamp, the air pushes up the water, meaning that having air mixed with the water gives it a lighter density! That's how my lava lamp works. Real lava lamps use heat instead of air to work. Instead of oil, there is a wax mixture that has a heavier density than water. It has a much lighter density once it heats up, which lowers the water. Once it cools off it lowers again, which switches the wax and water over and over again. The switching gives it a sort-of lava effect.

/\/\/\/\/\/\/\/\/\/\/\/\/\/\/\/\/\/\/\/\/\/\/\/\/\/\/\/\/\/\/\/\/\/\/\/\/\/\/\/\/\/\/\/\/\/\/\/\/\/\/\/\/\/\/\/\/\/\/\/\/\/\/\/\/\/\/\/\/\/\/\/\/\

I hope you enjoyed the post. The video editor was having some trouble processing the video, but I was able to put it up. I will be making the next post soon. Bye!
/\/\/\/\/\/\/\/\/\/\/\/\/\/\/\/\/\/\/\/\/\/\/\/\/\/\/\/\/\/\/\/\/\/\/\/\/\/\/\/\/\/\/\/\/\/\/\/\/\/\/\/\/\/\/\/\/\/\/\/\/\/\/\/\/\/\/\/\/\/\/\/\/\

Wednesday, August 10, 2016

15th Tinker Crate

/\/\/\/\/\/\/\/\/\/\/\/\/\/\/\/\/\/\/\/\/\/\/\/\/\/\/\/\/\/\/\/\/\/\/\/\/\/\/\/\/\/\/\/\/\/\/\/\/\/\/\/\/\/\/\/\/\/\/\/\/\/\/\/\/\/\/\/\/\/\/\/\/\
Hey guys! Enjoy my video!


/\/\/\/\/\/\/\/\/\/\/\/\/\/\/\/\/\/\/\/\/\/\/\/\/\/\/\/\/\/\/\/\/\/\/\/\/\/\/\/\/\/\/\/\/\/\/\/\/\/\/\/\/\/\/\/\/\/\/\/\/\/\/\/\/\/\/\/\/\/\/\/\/\

I hope you enjoyed the video. Please like and comment. I'll see you in the next post!
/\/\/\/\/\/\/\/\/\/\/\/\/\/\/\/\/\/\/\/\/\/\/\/\/\/\/\/\/\/\/\/\/\/\/\/\/\/\/\/\/\/\/\/\/\/\/\/\/\/\/\/\/\/\/\/\/\/\/\/\/\/\/\/\/\/\/\/\/\/\/\/\/\

Thursday, August 4, 2016

Magnetism Tinker Lab : Part 2

/\/\/\/\/\/\/\/\/\/\/\/\/\/\/\/\/\/\/\/\/\/\/\/\/\/\/\/\/\/\/\/\/\/\/\/\/\/\/\/\/\/\/\/\/\/\/\/\/\/\/\/\/\/\/\/\/\/\/\/\/\/\/\/\/\/\/\/\/\/\/\/\/\
Hey again guys! Today I will be showing you my projects.

JUMPING TOY
~~~~~~~~~~~~~
This toy was pretty easy to make, I just needed....

- Tape
 - Small Toy
 - Bottle Cap
  - 2 Ring Magnets
 - Paper
First, I took the bottle cap, and taped a ring magnet on the inside of it. To make it bounce, I flipped the magnet to repel the magnet in the bottle cap, then I taped that magnet to the piece of paper. I completed the toy by taping the small toy to the bottle cap.


HOME-MADE COMPASS
~~~~~~~~~~~~~~~~~~~~~
This project was a bit challenging, but I was able to make it.

- Bowl of Water
- Cork
- Paper clip
- Ring Magnet

I took the paper clip and bent it straight. To make the paper clip work like a compass needle, I magnetized the paper clip with the ring magnet. Then I stuck it through the middle of the cork. It took a couple of tries, but I managed to get it through the cork. I gently put the cork in the bowl of water. When it stopped spinning in the bowl, it was pointing North/South. Then I used the magnet to see if the needle would follow the magnet.


WACKY PENDULUM
~~~~~~~~~~~~~~~~~~
This project is my favorite one. Here are the items I needed.....

- Pencil
- Tape
- String
- Straw
- Grey and Orange Foam (Small Hole)
- Ring Magnet
- Tinker Crate Box
- Scissors

To make the base, I flipped the tinker crate box to the side so the long sides are facing up. The pendulum needed a place to hang, so I taped the pencil on to the tinker crate box. The pendulum was pretty easy to make. I put the foam on the magnet, orange on the top and grey on the bottom. Then I cut the straw into a small piece, and slid it into the magnet. I hung it by slipping a piece of string into the straw, and tied it on by looping it around the string at the top. To finish the pendulum, I tied and taped it on the pencil. Another magnet that repelled the pendulum had to be on the surface so the pendulum would move in different directions. Here is the video of all of the magnet projects.


Do you know what a magnetic field looks like? If you were wondering what a ring magnets field was like, it would probably look like the picture below. When you feel the magnets attracting each other, that means they are within the magnetic field. The size may vary depending on the size and shape.


/\/\/\/\/\/\/\/\/\/\/\/\/\/\/\/\/\/\/\/\/\/\/\/\/\/\/\/\/\/\/\/\/\/\/\/\/\/\/\/\/\/\/\/\/\/\/\/\/\/\/\/\/\/\/\/\/\/\/\/\/\/\/\/\/\/\/\/\/\/\/\/\/\

I hope you enjoyed the post. In the next post I will have a new tinker crate to un-box. Bye!
/\/\/\/\/\/\/\/\/\/\/\/\/\/\/\/\/\/\/\/\/\/\/\/\/\/\/\/\/\/\/\/\/\/\/\/\/\/\/\/\/\/\/\/\/\/\/\/\/\/\/\/\/\/\/\/\/\/\/\/\/\/\/\/\/\/\/\/\/\/\/\/\/\

Monday, August 1, 2016

Magetism Tinker Lab : Part 1

/\/\/\/\/\/\/\/\/\/\/\/\/\/\/\/\/\/\/\/\/\/\/\/\/\/\/\/\/\/\/\/\/\/\/\/\/\/\/\/\/\/\/\/\/\/\/\/\/\/\/\/\/\/\/\/\/\/\/\/\/\/\/\/\/\/\/\/\/\/\/\/\/\
Hey guys. The camera broke and I have no un-boxing video. The items in the tinker crate were...

Ring Magnets X9
4 Piece Wood Frame Set
Notepad
Pencil
Pencil Sharpener
Acrylic Rods X2
Plastic Tube
Metal Cone
Magnet Guide
Mini Rubber bands X4
Sticky foam
Blueprints
Tinker-Zine

THE FIRST MAGNET, MAYBE?
~~~~~~~~~~~~~~~~~~~~~~~~~~~
Have you ever wondered where the first magnet came from? Once upon a time, there was a man named Magnus. One day, when he was keeping an eye on his sheep, his sandal stuck to a rock. Something was keeping the nails in his sandal attached to the rock. That something was magnetism. We don't know if it's true, but its a theory.

MAGNETS AND THEIR USES
~~~~~~~~~~~~~~~~~~~~~~~~~~
Magnet's have many uses. Magnets are used in refrigerators, DVD players, speakers, and more. Roller coasters use magnets too! That's right, roller coasters use magnetism to make the ride really fast. Older ones use gravity. There is a train that uses magnetic levitation (Maglev) to get around really fast. It's all the way in Shanghai. One is being built in Japan, but it won't be completed for another 11 years. NASA is making a rocket sled that goes into space. It has a track like a roller coaster, that uses maglev, and a sled with a shuttle attached to it! The track has to go up the side of a mountain to work. Small models are being tested today, but we don't know what the future has in store.
Maglev Train
Maglev Sled


 MAGLEV PENCIL HOLDER
~~~~~~~~~~~~~~~~~~~~~~~~
 Magnetic Levitation is important, but holding a pencil? It's possible with the items listed below.....

6 Ring Magnets
Wood Frame Pieces
Pencil
Pencil Sharpener
2 Acrylic Rods
Metal Cone
2 Mini Rubber Bands
Sticky Foam Rings and Pads(Grey and Orange)

 Before I could start on the main frame, I had to label the magnets first. When all of the magnets were stacked up, I put an orange foam ring with a large hole on top of the top magnet. Then I took a grey foam ring, took the top magnet off the stack, and put the ring on the bottom of that magnet. I repeated with the rest of the magnets, two of the magnets had foam rings with large holes, and the other ones had foam rings with small holes.

 When it was time to make the frame, I stuck the foam pads on to the large frame pieces. Then I completed my frame by attaching the large pieces to the long pieces that supported the frame. Taking the 4 magnets with small holes, I slid two magnets on each of the acrylic rods. I attached the rods to the large pieces and adjusted the rods evenly.

 The main part was done, but I needed the pencil tube done. I got the metal cone and slid the mini rubber bands on it so when the cone was slid into the end of the straw, it would be firm in place. To make the pencil tube float, I slid the magnets on the tube and positioned them with the magnet guide. All I needed to do was put the tube in between the rods and slide the pencil into the tube.


/\/\/\/\/\/\/\/\/\/\/\/\/\/\/\/\/\/\/\/\/\/\/\/\/\/\/\/\/\/\/\/\/\/\/\/\/\/\/\/\/\/\/\/\/\/\/\/\/\/\/\/\/\/\/\/\/\/\/\/\/\/\/\/\/\/\/\/\/\/\/\/\/\

I hope you enjoyed the post. If you did, please leave a like. I will see you in the next post. Bye guys!
/\/\/\/\/\/\/\/\/\/\/\/\/\/\/\/\/\/\/\/\/\/\/\/\/\/\/\/\/\/\/\/\/\/\/\/\/\/\/\/\/\/\/\/\/\/\/\/\/\/\/\/\/\/\/\/\/\/\/\/\/\/\/\/\/\/\/\/\/\/\/\/\/\

Thursday, July 21, 2016

Shake, Shake, IT'S AN EARTHQUAKE! : Part 2

/\/\/\/\/\/\/\/\/\/\/\/\/\/\/\/\/\/\/\/\/\/\/\/\/\/\/\/\/\/\/\/\/\/\/\/\/\/\/\/\/\/\/\/\/\/\/\/\/\/\/\/\/\/\/\/\/\/\/\/\/\/\/\/\/\/\/\/\/\/\/\/\/\
Hey guys! Today I have a new post. Please enjoy!

How to make an Earthquake-proof Building
~~~~~~~~~~~~~~~~~~~~~~~~~~~~~~~~~~
In order to have an earthquake-proof building, it needs to have strength, flexibility, and vibration control. To have a strong building, you'll need to have a strong material, like concrete. Concrete is a strong material, but it can shake apart if an earthquake were to come along. You would also need a flexible frame to have the building bend and sway with the earthquake. Steel is a very flexible metal, it's used in frames on buildings in earthquake zones. The building needs vibration control to be complete. Without the vibration, it would survive only a short time in an earthquake. The building needs to respond to the shaking and transfer most of the energy back to the ground and keep it from shaking a lot. Reducing the shaking of the building helps too. That's all you need to make an earthquake-proof building.

THE EARTHQUAKE DETECTOR
~~~~~~~~~~~~~~~~~~~~~~~~~~~~
Once upon a time, there was a polymath named Zhang Heng who lived in China nearly 2000 years ago. He invented the first ever earthquake detector, AKA the seismometer. It was made with a pendulum that swung in the direction of an earthquake. Wherever it swung, it would knock a ball out of one of the eight dragons mouths and into a toad's mouth below. Whichever ball dropped, that way was where the earthquake was. One day, he decided to take it into court. His rivals weren't very hopeful about the device. One time the device went off, but no one felt a thing. They all laughed at him! Later, someone came by and reported that an earthquake happened at the exact place the detector said it would.
/\/\/\/\/\/\/\/\/\/\/\/\/\/\/\/\/\/\/\/\/\/\/\/\/\/\/\/\/\/\/\/\/\/\/\/\/\/\/\/\/\/\/\/\/\/\/\/\/\/\/\/\/\/\/\/\/\/\/\/\/\/\/\/\/\/\/\/\/\/\/\/\/\

I hope enjoyed the post. Please like and comment. In the next post I will have a new unboxing video. Bye guys!
/\/\/\/\/\/\/\/\/\/\/\/\/\/\/\/\/\/\/\/\/\/\/\/\/\/\/\/\/\/\/\/\/\/\/\/\/\/\/\/\/\/\/\/\/\/\/\/\/\/\/\/\/\/\/\/\/\/\/\/\/\/\/\/\/\/\/\/\/\/\/\/\/\

Thursday, July 14, 2016

Shake, Shake, IT'S AN EARTHQUAKE! : Part 1

/\/\/\/\/\/\/\/\/\/\/\/\/\/\/\/\/\/\/\/\/\/\/\/\/\/\/\/\/\/\/\/\/\/\/\/\/\/\/\/\/\/\/\/\/\/\/\/\/\/\/\/\/\/\/\/\/\/\/\/\/\/\/\/\/\/\/\/\/\/\/\/\/\
 Hi guys! I have a new post today about my speed video for the shake table.


 Surviving an Earthquake- TAIPEI 101
~~~~~~~~~~~~~~~~~~~~~~~~~~~~~~
A building that survived many earthquakes and is the tallest building in Taiwan is called Taipei 101 (Center). It's over half a kilometer tall. The building is famous for the damper (Left) on the inside of the building. A damper is a ball that reduces vibrations in an earthquake. Without the damper, the building would shake apart. I made one out of washers for my building. It reminds me of a pendulum that moves the opposite way the building is moving. The damper is nearly 1.5 MILLION POUNDS!!!! There are also cables suspending it that are more than 3 inches thick, and pistons that support the bottom of the damper. The pistons also act as shock absorbers. The damper is so famous, it has it's own mascot, the damper baby! (Right)


/\/\/\/\/\/\/\/\/\/\/\/\/\/\/\/\/\/\/\/\/\/\/\/\/\/\/\/\/\/\/\/\/\/\/\/\/\/\/\/\/\/\/\/\/\/\/\/\/\/\/\/\/\/\/\/\/\/\/\/\/\/\/\/\/\/\/\/\/\/\/\/\/\

I hope you enjoyed the post. If you did, please like and comment. See you in the next post! Bye guys!
/\/\/\/\/\/\/\/\/\/\/\/\/\/\/\/\/\/\/\/\/\/\/\/\/\/\/\/\/\/\/\/\/\/\/\/\/\/\/\/\/\/\/\/\/\/\/\/\/\/\/\/\/\/\/\/\/\/\/\/\/\/\/\/\/\/\/\/\/\/\/\/\/\

Monday, July 11, 2016

13th Tinker Crate

/\/\/\/\/\/\/\/\/\/\/\/\/\/\/\/\/\/\/\/\/\/\/\/\/\/\/\/\/\/\/\/\/\/\/\/\/\/\/\/\/\/\/\/\/\/\/\/\/\/\/\/\/\/\/\/\/\/\/\/\/\/\/\/\/\/\/\/\/\/\/\/\/\
Hey guys! Today I have a new unboxing video. I hope you enjoy it!


/\/\/\/\/\/\/\/\/\/\/\/\/\/\/\/\/\/\/\/\/\/\/\/\/\/\/\/\/\/\/\/\/\/\/\/\/\/\/\/\/\/\/\/\/\/\/\/\/\/\/\/\/\/\/\/\/\/\/\/\/\/\/\/\/\/\/\/\/\/\/\/\/\

I hope you enjoyed the video. If you did, please leave this post a like and a comment. I will see you in the next post. Bye guys!
/\/\/\/\/\/\/\/\/\/\/\/\/\/\/\/\/\/\/\/\/\/\/\/\/\/\/\/\/\/\/\/\/\/\/\/\/\/\/\/\/\/\/\/\/\/\/\/\/\/\/\/\/\/\/\/\/\/\/\/\/\/\/\/\/\/\/\/\/\/\/\/\/\

Ready, Aim, FIRE!!! : Part 2

/\/\/\/\/\/\/\/\/\/\/\/\/\/\/\/\/\/\/\/\/\/\/\/\/\/\/\/\/\/\/\/\/\/\/\/\/\/\/\/\/\/\/\/\/\/\/\/\/\/\/\/\/\/\/\/\/\/\/\/\/\/\/\/\/\/\/\/\/\/\/\/\/\
Konichiwa! Today I will be talking about some of my activities I did.

DANCING PUPPET
~~~~~~~~~~~~~~~~~~
This activity has to do with levers. What I needed was....

- Cardboard (I got some from a soda box.)
- Markers (Black, White, Red, Purple.)
- Scissors
- Paper Fasteners
- String/Yarn ( I used thread.)
- Tape
- 4 Pennies

I cut out the shape of what I wanted my puppet to be. The puppet I wanted to make was the Marionette from the game Five Nights at Freddy's. I cut out the shape of the puppets body and head, and decorated it. Then I cut out the arms and legs out separately and colored them in. To make the arms and legs move on the body, I taped a piece of  to the side of the arm that connects the arm to the body. I did the same thing to the other arm and the legs. Taking the 4 pennies, I taped one to the end of each arm and leg. Then I poked a hole in between the string and the penny for each arm and leg. The hole had to be closer to the string than the penny. Then I connected the arms and legs to the body with a paper fastener. To make the puppet dance, I just had to pull the strings.

How does it work? The arms and legs are like a seesaw. AKA a first class lever. The fastener is the balancing point, the penny is the load, and the string is the effort to lift the penny up. Easy!
FLOATING PING-PONG BALL
~~~~~~~~~~~~~~~~~~~~~~~~~~~~
This project was really simple, all I needed was a hairdryer, and my ping-pong ball. I put my ping-pong ball on the hairdryer and switched it onto normal. There are two things that are making the ping-pong ball float up. It's gravity and the air coming from the hairdryer. Gravity pulls down the ball and the air pushes it up. That's air resistance at it's work. If the pull of gravity and the push of the air are equal, the ball floats!


MARSHMALLOW SHOOTER
~~~~~~~~~~~~~~~~~~~~~~~~~~~
Shooting a marshmallow? Are you sure that you can shoot a marshmallow? You can! With these items....
- 2 Toilet Paper Rolls
- 2 Rubber Bands (Thin)
- Pencil
- Duct Tape
- Hole Punch
- Scissors

I took my first toilet paper roll, and cut a straight line lengthwise down. Then I overlapped the roll to make it smaller, and taped it together. For the handle of the launcher, I punched two holes aligned in the top of the toilet paper roll, and slid the pencil in. Now that I'm done with the first roll, it's time for the second roll. Taking the scissors and the toilet paper roll, and cut two slits into the top of the roll. I did the same for the opposite side. Then I took the two rubber bands, and put one on each side. Taking tube 1, I slid it into the bottom of tube 2. To complete the launcher, all I had to do was slide the rubber bands on the pencil. I didn't have any marshmallows, but I did have mini ping-pong balls!
All I had to do was load a mini ping-pong ball into the launcher, pull back the pencil, and let go.

/\/\/\/\/\/\/\/\/\/\/\/\/\/\/\/\/\/\/\/\/\/\/\/\/\/\/\/\/\/\/\/\/\/\/\/\/\/\/\/\/\/\/\/\/\/\/\/\/\/\/\/\/\/\/\/\/\/\/\/\/\/\/\/\/\/\/\/\/\/\/\/\/\

I hope you enjoyed the post. If you did, please like and comment. In the next post I'll be unboxing a new tinker crate. Bye! <3
/\/\/\/\/\/\/\/\/\/\/\/\/\/\/\/\/\/\/\/\/\/\/\/\/\/\/\/\/\/\/\/\/\/\/\/\/\/\/\/\/\/\/\/\/\/\/\/\/\/\/\/\/\/\/\/\/\/\/\/\/\/\/\/\/\/\/\/\/\/\/\/\/\

Thursday, June 30, 2016

Ready, Aim, FIRE!!! : Part 1

/\/\/\/\/\/\/\/\/\/\/\/\/\/\/\/\/\/\/\/\/\/\/\/\/\/\/\/\/\/\/\/\/\/\/\/\/\/\/\/\/\/\/\/\/\/\/\/\/\/\/\/\/\/\/\/\/\/\/\/\/\/\/\/\/\/\/\/\/\/\/\/\/\
 Hey guys! Today I have a new post about trebuchets. I have a speed video for making the trebuchet. Then I'll talk about levers and their classes.

SPEED VIDEO: TREBUCHET
~~~~~~~~~~~~~~~~~~~~~~~~~~


NOT SO SIMPLE MACHINES
~~~~~~~~~~~~~~~~~~~~~~~~~~
Have you ever used something like a spoon to pry open some sort of container? If you've done that before, you used a lever! From tweezers to a broom, there are many different types of levers that are used for different things. They are very useful because they help do things people can't do, like crack a nut. If you are on a seesaw, and somebody bigger than you gets on the other side, he goes down, and you go up. How can you make him go up? Good Question! If the balancing point was closer to the bigger kid, you could lift him up easy as pie!The first person to figure out how to use a lever was a mathematician known as Archimedes. He was also a scientist, inventor, and engineer. One of his sayings was....
"Give me a firm spot on which to stand,
And I shall move the Earth."
 
You can lift almost anything with a lever, the further the balancing point is from you, the easier it is to lift an object. There are different levers with different jobs. I'm gonna talk about 3 lever jobs.

LEVER JOBS
~~~~~~~~~~~~~~
Some levers have a job for lifting things. Have you ever tried to lift 3 books with one finger? I know that it hurts! With a couple of pencils, you can lift the books with little effort! You just need to position the pencils like a seesaw.

Do you have a nutcracker? I do, and I know that nutcrackers are levers with a job for breaking things. Try cracking a nut faraway from the hinge. Now try it with the nut close to the hinge. What's the difference? Leave your answer in the comments below.

Last is the most common job for a lever.... moving things! Your arm is a lever! Put your elbow on the table and put your finger on your hand, then move your hand upward. Your hand moved your finger a lot! This is an example of your arm being a lever.

These levers belong to 3 different classes. The 1st class of levers is like a seesaw. Your effort is on the left, the load is on the right, and the balancing point is in the middle. The other two classes are way different. For the 2nd class, the effort is on the left, the balancing point is on the right, and the load is in the middle. Last, but not least, the 3rd class. The 3rd class is like the 2nd except the load and the effort switch places. Those jobs aren't the only jobs that people need help with. There are many other jobs and levers out there. Like builders say, "You need the right tool for the job!"
Class 3 is set wrong. Sorry.
/\/\/\/\/\/\/\/\/\/\/\/\/\/\/\/\/\/\/\/\/\/\/\/\/\/\/\/\/\/\/\/\/\/\/\/\/\/\/\/\/\/\/\/\/\/\/\/\/\/\/\/\/\/\/\/\/\/\/\/\/\/\/\/\/\/\/\/\/\/\/\/\/\

I hope you enjoyed my post about levers. In the post I'll be showing some of my activities. Bye guys! <3
/\/\/\/\/\/\/\/\/\/\/\/\/\/\/\/\/\/\/\/\/\/\/\/\/\/\/\/\/\/\/\/\/\/\/\/\/\/\/\/\/\/\/\/\/\/\/\/\/\/\/\/\/\/\/\/\/\/\/\/\/\/\/\/\/\/\/\/\/\/\/\/\/\

Thursday, June 23, 2016

12th Tinker Crate

/\/\/\/\/\/\/\/\/\/\/\/\/\/\/\/\/\/\/\/\/\/\/\/\/\/\/\/\/\/\/\/\/\/\/\/\/\/\/\/\/\/\/\/\/\/\/\/\/\/\/\/\/\/\/\/\/\/\/\/\/\/\/\/\/\/\/\/\/\/\/\/\/\
Greetings from the world of Tinker Crate! I have a new unboxing video. Enjoy the video! Sorry about the "Are we rolling?" There's something wrong with the original video.


 /\/\/\/\/\/\/\/\/\/\/\/\/\/\/\/\/\/\/\/\/\/\/\/\/\/\/\/\/\/\/\/\/\/\/\/\/\/\/\/\/\/\/\/\/\/\/\/\/\/\/\/\/\/\/\/\/\/\/\/\/\/\/\/\/\/\/\/\//\/\/\/\

Hope you enjoyed the video. In the next post I'll have a speed video for making the trebuchet.
/\/\/\/\/\/\/\/\/\/\/\/\/\/\/\/\/\/\/\/\/\/\/\/\/\/\/\/\/\/\/\/\/\/\/\/\/\/\/\/\/\/\/\/\/\/\/\/\/\/\/\/\/\/\/\/\/\/\/\/\/\/\/\/\/\/\/\/\/\/\/\/\/\

Wednesday, June 22, 2016

Star of the Show! : Part 2

/\/\/\/\/\/\/\/\/\/\/\/\/\/\/\/\/\/\/\/\/\/\/\/\/\/\/\/\/\/\/\/\/\/\/\/\/\/\/\/\/\/\/\/\/\/\/\/\/\/\/\/\/\/\/\/\/\/\/\/\/\/\/\/\/\/\/\/\/\/\/\/\/\
 Hey again! Today I have two more stories and a special experiment.

This story is from Lakota Sioux, North America. It's called "Fallen Star and the Hand." Once upon a time, there was a Chief of the Lakota Tribe. He was a very selfish leader and didn't care about his people. So, the gods made the people in the tribe rip off his arm. His daughter was really upset because her fathers arm was ripped off. She declared that if anybody found the arm, she would marry him. The person that found the hand was a young warrior by the name of Fallen Star. He married her and they lived happily ever after.
 I think it should be called "Fallen Star and the Arm."

This story is a interesting one. It's called "The Herd Boy and the Weaver Girl." Long ago, a Sky King created the heavens. He decorated it with stars, and had his daughter weave the clouds. She was really exhausted after that because the sky was really large, so her father sent her to play in the stars. When the princess decided to swim in the Milky Way, she saw a handsome herd boy, he was watching his water buffalo graze. She lost track of time and her father found out why. He flooded the Milky Way so she couldn't see him again. She cried and cried until her father made an agreement. On the seventh day of the seventh month of every year, he would send out a flock of birds to make a bridge across the Milky Way.

BENDING LIGHT
~~~~~~~~~~~~~~~~~~


/\/\/\/\/\/\/\/\/\/\/\/\/\/\/\/\/\/\/\/\/\/\/\/\/\/\/\/\/\/\/\/\/\/\/\/\/\/\/\/\/\/\/\/\/\/\/\/\/\/\/\/\/\/\/\/\/\/\/\/\/\/\/\/\/\/\/\/\/\/\/\/\/\

I hope you enjoyed this post. Please like and comment if you did. I will have a new unboxing video in the next post. Bye guys! <3
/\/\/\/\/\/\/\/\/\/\/\/\/\/\/\/\/\/\/\/\/\/\/\/\/\/\/\/\/\/\/\/\/\/\/\/\/\/\/\/\/\/\/\/\/\/\/\/\/\/\/\/\/\/\/\/\/\/\/\/\/\/\/\/\/\/\/\/\/\/\/\/\/\

Tuesday, April 19, 2016

Star of the Show! : Part 1


/\/\/\/\/\/\/\/\/\/\/\/\/\/\/\/\/\/\/\/\/\/\/\/\/\/\/\/\/\/\/\/\/\/\/\/\/\/\/\/\/\/\/\/\/\/\/\/\/\/\/\/\/\/\/\/\/\/\/\/\/\/\/\/\/\/\/\/\/\/\/\/\/\
Hey again! Today I have a brand new tinker crate about Fiber Optics.

FIBER OPTIC STARS
~~~~~~~~~~~~~~~~~~~~~
 The materials for this experiment are....
  •  Battery pack
  •  Batteries
  •  Resistor
  •  Red jumper wire
  •  LED light bulb
  •  Illuminator box
  •  Sticky foam
  •  Sheet of constellations
  •  2 Foam sheets
  •  Pushpin
  •  White crayon
  •  Optical fibers (As many as I needed.)
  •  Glue pen
  •  2 Zip ties
  •  Scissors

First I put the batteries in the pack. Taking the resistor and the scissors, I cut both wires on the resistor in half. I connected it to the red jumper wire and the battery pack. Then bending the LED wires, I connected the longer end to the red wire and the shorter end to the black.

Now that the light was done, now for the box. There were 3 parts, A, B, and C. 
A = Front Flaps
B = Back Flaps
C = Side Flaps

I folded the A and B flaps inwards. Then I folded C's flaps in to keep those flaps inwards. I locked the Left flap by folding up the guide pieces upwards. Taking 4 pieces of foam, I placed 2 pieces where the battery pack goes and 2 where the wires go. I placed the battery pack in the box, there was a little hole where the switch went, so the pack had to be lined up evenly. Taking the wire ends that were connected to the resistor, I stuck them to the foam. I also positioned the light bulb so it was poking through a hole in one of the first guide piece.

To complete the fiber optic stars, I needed to make a constellation! I put the black foam on the tinker crate, and the constellation sheet on the black foam. The constellation sheet had a bunch of constellations on it that I could choose from. I chose Orion the hunter, so I lined up the sheet with the foam and used the pushpin to punch out the stars for my constellation. Taking a bunch of optical fibers, I stuck them in the holes one by one on the backside of the foam. I used a crayon to make the picture in the stars. To make sure they stayed in the holes, I used the glue pen to make a circle of glue around all of the optical fibers. After they dried, I lined up the ends of the fibers so they were even. Then I attached the fibers with a zip tie and cut off the rest off. To keep the fibers in place, I put a little bit of glue in between the fibers. Once that dried, I secured the fibers in the box and closed it. The constellation was complete! I turned it on to light up the stars.

 STAR STORIES
~~~~~~~~~~~~~~~~~
Constellations aren't just pictures in the night sky. They tell stories from ancient religions and places.
This is a story from Navajo, North America, it's called " The Changing Bear Maiden." A long time ago, a maiden had married a bear. One of her sisters found out about the marriage and told her father about it. He was so mad that he killed the bear. The maiden couldn't "bear" it, so she turned herself into a bear and killed her family one by one. Her family turned into stars and made the "Ursa Major" constellation.

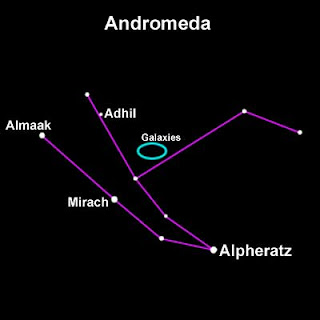
My favorite story, "The Story of Andromeda," is all the way from Ancient Greece. Long ago, a goddess named Cassiopeia, proclaimed herself the prettiest creature ever! This made Poseidon, god of the seas, mad because one of the creatures in the sea were the sea nymphs, which were extremely pretty. He sent a sea monster out and wouldn't take it back unless she took back the statement, but she didn't. As punishment, she had to sacrifice her daughter Andromeda to the monster. As Andromeda was chained to a rock, the monster was drawing near. She could do nothing but wait. Then, as the monster was getting closer, Perseus came out of the sky with Medusa's head in his bag. He turned the monster to stone and saved Andromeda. Perseus married her and lived happily ever after.


This story, " The Story of the Seven Sages," is all the way from Ancient India. It is about the big dipper. Each star was a sage. The seven sages were married to seven sisters, and they made one big happy family. One day, the god of fire came along and saw the girls in the sky. He fell in love with all of them. He went for a walk in the forest to try and shake it off. Instead, he met another girl named Svaha. She fell in love with him. To capture his affections, she tricked him by disguising herself as each of the seven sisters. The Sages were fooled by the trick as well, but they found out the truth.The seventh sister loved her husband too much, and she didn't want to be imitated. Angry, they sent the sisters to another part of the sky, except for the seventh, she stayed with her husband and they lived happily ever after.

/\/\/\/\/\/\/\/\/\/\/\/\/\/\/\/\/\/\/\/\/\/\/\/\/\/\/\/\/\/\/\/\/\/\/\/\/\/\/\/\/\/\/\/\/\/\/\/\/\/\/\/\/\/\/\/\/\/\/\/\/\/\/\/\/\/\/\/\/\/\/\/\/\

Hope you enjoyed the post. Please like and comment. In the next post, I'll have two more stories to tell. Bye guys! <3
/\/\/\/\/\/\/\/\/\/\/\/\/\/\/\/\/\/\/\/\/\/\/\/\/\/\/\/\/\/\/\/\/\/\/\/\/\/\/\/\/\/\/\/\/\/\/\/\/\/\/\/\/\/\/\/\/\/\/\/\/\/\/\/\/\/\/\/\/\/\/\/\/\

Thursday, March 24, 2016

Eleventh Tinker crate

/\/\/\/\/\/\/\/\/\/\/\/\/\/\/\/\/\/\/\/\/\/\/\/\/\/\/\/\/\/\/\/\/\/\/\/\/\/\/\/\/\/\/\/\/\/\/\/\/\/\/\/\/\/\/\/\/\/\/\/\/\/\/\/\/\/\/\/\/\/\/\/\/\
Hey guys! Here is a new unboxing video.


/\/\/\/\/\/\/\/\/\/\/\/\/\/\/\/\/\/\/\/\/\/\/\/\/\/\/\/\/\/\/\/\/\/\/\/\/\/\/\/\/\/\/\/\/\/\/\/\/\/\/\/\/\/\/\/\/\/\/\/\/\/\/\/\/\/\/\/\/\/\/\/\/\

Wednesday, March 23, 2016

My Uplifting Gravity Kit: Part 2

/\/\/\/\/\/\/\/\/\/\/\/\/\/\/\/\/\/\/\/\/\/\/\/\/\/\/\/\/\/\/\/\/\/\/\/\/\/\/\/\/\/\/\/\/\/\/\/\/\/\/\/\/\/\/\/\/\/\/\/\/\/\/\/\/\/\/\/\/\/\/\/\/\
Hey guys! Today I'm going to talk about how carnival games are rigged and some of the projects I did.


Many carnival games look easy to beat, but thanks to workers rigging them, they're quite hard. There are many games that are rigged. Some of these games have to do with the center of mass. I'm only going to explain three.

THE MILK BOTTLES
~~~~~~~~~~~~~~~~~~~~~~
I bet you know this game. To win the game, you got to knock down three milk bottles. BEWARE: Things are not what they seem! The milk bottles are really heavy at the bottom of the stack. (That makes the center of mass really low. To demonstrate a throw, the operator would have a heavy milk bottle on the top of the stack. When the operator throws, the bottles fall easily. That makes it look easy, when it's time for your throw, TA-DA! Knocking down all three bottles is quite hard. If you want to win, throw really hard at the bottom heavy bottles.

THE LADDER
~~~~~~~~~~~~~~~~
This game is pretty tricky. If you lean to one side, it will flip over and you'll be on the mat. If you're good at balancing on wobbly things, this game is for you. Balance is the key to winning this game. Keep your feet on the rungs as far apart as they can go. Put both of your hands on the ropes and move opposite limbs. That will keep your center of mass in the middle of the ladder. They had this game at Six Flags. It was hard when I first tried it


CAT RACK
~~~~~~~~~~~~~ 
This is the game you have to watch out for. You have to knock down 3 cats to win a prize. It's nearly impossible, because:

  1. Crazy hair makes it hard to aim right.
  2. Most of the cats have weights to make the game harder/impossible.
  3. Movable weights that can move with the flick of the hand.
  4. Operators are C-H-E-A-T-E-R-S because they rig the games!
The operator would move the weight up so if he/she throws a ball, the cat falls down easily. When it's your turn, the weight goes down to make it harder. ( Almost like the milk bottles.)


BALANCING BIRD
~~~~~~~~~~~~~~~~~~~~

My next project, the balancing bird, didn't really work, but I'll talk about it anyway. For this project, I needed...

- Pop-out bird pieces
- 2 Dimes
- Clear tape

First I folded the two heads parts together and taped them together to make the head. Taking two pieces of tape, I taped a dime on each wing of the bird. Folding the two bird sides, I slid the tail in and taped the two sides on the bottom of the bird. The bird was supposed to balance on my index finger and stay there. It didn't work, but it was worth a try. I think it didn't work because the dimes were too close to the tip of the wings.


CENTER OF MASS DETECTOR
~~~~~~~~~~~~~~~~~~~~~~~~~~~~~
For this, I needed...
- Empty Cheerios box
- Scissors
- Pushpin
- Pencil
- String
- Quarter

I took the Cheerios box and cut out the front. Then I cut out a weird, unusual shape from the front. Tying the pushpin and the quarter on either end of the string, I pushed it into the top of my weird shape. To find out where the center of mass was, I had to draw a line where the string fell. I did this step again at a different side of the shape. Where the lines met, I had to draw a Circle around. That's where the center of mass is. If the string falls through the circle, it near the center of mass.

/\/\/\/\/\/\/\/\/\/\/\/\/\/\/\/\/\/\/\/\/\/\/\/\/\/\/\/\/\/\/\/\/\/\/\/\/\/\/\/\/\/\/\/\/\/\/\/\/\/\/\/\/\/\/\/\/\/\/\/\/\/\/\/\/\/\/\/\/\/\/\/\/\

I hope you enjoyed this post, if you did please like and comment. In the next post I'll have a new tinker crate. Bye guys! <3
/\/\/\/\/\/\/\/\/\/\/\/\/\/\/\/\/\/\/\/\/\/\/\/\/\/\/\/\/\/\/\/\/\/\/\/\/\/\/\/\/\/\/\/\/\/\/\/\/\/\/\/\/\/\/\/\/\/\/\/\/\/\/\/\/\/\/\/\/\/\/\/\/\

Thursday, March 10, 2016

timeline

Aidan and i are working on a timeline project, just checking the rough draft here, please ignore.

Wednesday, March 2, 2016

Galileo's Experiments

/\/\/\/\/\/\/\/\/\/\/\/\/\/\/\/\/\/\/\/\/\/\/\/\/\/\/\/\/\/\/\/\/\/\/\/\/\/\/\/\/\/\/\/\/\/\/\/\/\/\/\/\/\/\/\/\/\/\/\/\/\/\/\/\/\/\/\/\/\/\/\/\/\
Caio! Today I have a post about certain gravity experiments. Some of these tests were done by Galileo Galilee. Please enjoy the video I've made. I recorded it with my camcorder.


/\/\/\/\/\/\/\/\/\/\/\/\/\/\/\/\/\/\/\/\/\/\/\/\/\/\/\/\/\/\/\/\/\/\/\/\/\/\/\/\/\/\/\/\/\/\/\/\/\/\/\/\/\/\/\/\/\/\/\/\/\/\/\/\/\/\/\/\/\/\/\/\/\

Hope you enjoyed the video. If you did, please like and comment. Caio!
/\/\/\/\/\/\/\/\/\/\/\/\/\/\/\/\/\/\/\/\/\/\/\/\/\/\/\/\/\/\/\/\/\/\/\/\/\/\/\/\/\/\/\/\/\/\/\/\/\/\/\/\/\/\/\/\/\/\/\/\/\/\/\/\/\/\/\/\/\/\/\/\/\

My Uplifting Gravity Kit: Part 1

/\/\/\/\/\/\/\/\/\/\/\/\/\/\/\/\/\/\/\/\/\/\/\/\/\/\/\/\/\/\/\/\/\/\/\/\/\/\/\/\/\/\/\/\/\/\/\/\/\/\/\/\/\/\/\/\/\/\/\/\/\/\/\/\/\/\/\/\/\/\/\/\/\
 Hey again! Today I'll be talking about the gravity game I've made and the project "Rolling Uphill."

THE GRAVITY GAME
~~~~~~~~~~~~~~~~~~~~~
For the game, I needed.....
- Base piece
- Support pieces
- 2 Locking pieces
- Game board piece
- Sticky felt
- 4 Double stick foam
- Stickers
- Acrylic rods
- Marble

I first made the frame by sliding the support pieces into the slits on the base. Then I line up the felt so the tab on the wider end line up with the wider part of the frame. Sticking two pieces of foam on both sides on the wood, not the felt, I stuck the game board piece onto the foam. Then I labeled the holes with stickers on the game board piece, labeling them 10, 20, 30, 40, 50.  The sticker saying "GRAVITY GAME" went above the 10 points hole. After I added the stickers, I slid the two-hole locking piece through the narrow end of the game. Then I took the other locking piece and slid it into the notch in the other locking piece. To finish off the game, I took the acrylic rods and slid the straight ends through the slit at the wide support piece. Then I put the bent part of the rods into the holes of the first locking piece. TADAAA!

HOW TO PLAY THE GAME
~~~~~~~~~~~~~~~~~~~~~~~~~~
I put the marble by the marrow end of the game and spread out the rods until the ball starts rolling uphill! If the rods get pushed together at the same time, the ball stays on the rods and it goes up them. The aim of the game is to get 200 points. This is my favorite blueprint!


ROLLING UPHILL
~~~~~~~~~~~~~~~~~~~
How does the ball roll uphill? The ball is actually going downhill! It may look impossible, but here is a video on how it's possible.


The cone's point is the center of mass. It looks like it's going uphill, but the center of mass isn't! The center of mass is going downhill! I like the gravity game.!
/\/\/\/\/\/\/\/\/\/\/\/\/\/\/\/\/\/\/\/\/\/\/\/\/\/\/\/\/\/\/\/\/\/\/\/\/\/\/\/\/\/\/\/\/\/\/\/\/\/\/\/\/\/\/\/\/\/\/\/\/\/\/\/\/\/\/\/\/\/\/\/\/\

  I hope you enjoyed the post about gravity. If you did, please like and comment. I'll see you in the next post! Bye guys! <3
/\/\/\/\/\/\/\/\/\/\/\/\/\/\/\/\/\/\/\/\/\/\/\/\/\/\/\/\/\/\/\/\/\/\/\/\/\/\/\/\/\/\/\/\/\/\/\/\/\/\/\/\/\/\/\/\/\/\/\/\/\/\/\/\/\/\/\/\/\/\/\/\/\

Tuesday, February 23, 2016

My Tenth Tinker Lab

/\/\/\/\/\/\/\/\/\/\/\/\/\/\/\/\/\/\/\/\/\/\/\/\/\/\/\/\/\/\/\/\/\/\/\/\/\/\/\/\/\/\/\/\/\/\/\/\/\/\/\/\/\/\/\/\/\/\/\/\/\/\/\/\/\/\/\/\/\/\/\/\/\
Hey again guys! Today I have a new unboxing video about gravity! Please enjoy!


/\/\/\/\/\/\/\/\/\/\/\/\/\/\/\/\/\/\/\/\/\/\/\/\/\/\/\/\/\/\/\/\/\/\/\/\/\/\/\/\/\/\/\/\/\/\/\/\/\/\/\/\/\/\/\/\/\/\/\/\/\/\/\/\/\/\/\/\/\/\/\/\/\

Hope you enjoyed the gravity video, please like and comment. Bye guys! <3
/\/\/\/\/\/\/\/\/\/\/\/\/\/\/\/\/\/\/\/\/\/\/\/\/\/\/\/\/\/\/\/\/\/\/\/\/\/\/\/\/\/\/\/\/\/\/\/\/\/\/\/\/\/\/\/\/\/\/\/\/\/\/\/\/\/\/\/\/\/\/\/\/\

Friday, February 19, 2016

Automaton Time! : Part 3

/\/\/\/\/\/\/\/\/\/\/\/\/\/\/\/\/\/\/\/\/\/\/\/\/\/\/\/\/\/\/\/\/\/\/\/\/\/\/\/\/\/\/\/\/\/\/\/\/\/\/\/\/\/\/\/\/\/\/\/\/\/\/\/\/\/\/\/\/\/\/\/\/\
Hey again guys! Today I'll be talking about one of my projects and an automaton boy that could draw and write poems.

ART AUTOMATON
~~~~~~~~~~~~~~~~~~~~
To make the art automaton, I needed....
- 2 dowels
- Cams
- 2 cardboard pieces
- Straw
- Zip tie
- Tinker crate (Lid cut off)
- Craft knife
- Masking Tape

Positioning the box so one of the sides faces up, I cut two round holes halfway down from the top and half an inch away from the edge. I cut 2 1 in. straws to go through the holes. Then I slid the straws in the holes. Putting the short dowel on a short cardboard piece, I folded both sides up and tied them together with a zip tie. That's going to be the cam follower. Taking the long cardboard piece and folding it so the holes line up, I pushed the dowel through the holes. After that I taped the cardboard to the inside of the box. Then I cut a hole at the top so the dowel could move freely. Taking the long dowel and a random cam, I slid the dowel through one of the straws, the cam, and the other straw. If you turned the dowel, the cam will turn and the cam follower will move up and down. I had to make some art to complete the project.

If you saw my unboxing video, you may know the flap at the end of the tinker-zine is a cut-out page for the art automaton. There were butterfly wings, giraffe parts, an egg shell, monster, chicken, and a hat. The first cut-out art I did was the hatching egg.


The first thing to do was color in the shell and chicken. Then I taped the top shell to the head of the chicken. Taking the bottom eggshell and some tape, I taped the eggshell to the front of the box. Adding a piece of tape to the bottom of the chicken, I stuck it to the dowel. I had to use the cam that looked like a spiral to make the egg hatch. The other choice I had for the egg was the monster. The next thing I did was the nodding giraffe.


After I colored in the giraffe parts, I took the craft knife and cut a hole on the bottom of the neck and one on the top of the body. I attached the two parts together with a brad. The brad makes the neck move up and down. Cutting another hole in the middle of the neck, I slid another brad through and attached it to the dowel. I used the egg-shaped cam for the giraffe.

 The last one I did was the shivering penguin. I needed a photo of a penguin and the hat.
Cutting out the penguin and coloring in the hat, I taped the hat onto the penguin. I taped the penguin on the dowel and picked the decagon cam. As the cam turns, the penguin moves up and down so fast it looks like its shivering. I wasn't able to do the flapping butterfly because I didn't have a clothespin.

THE ANONYMOUS AUTOMATON
~~~~~~~~~~~~~~~~~~~~~~~~~~~~~~~~
Long ago, in November 1928, at a museum in Philadelphia, an unusual thing was unloaded. It looked like an automaton boy. A family (unknown) had passed it on for a long time, but the automaton was nearly destroyed in a fire. The family had donated it to the museum and told it could write poetry and draw beautiful pictures. Intrigued, the museum workers got straight to work to repair the automaton. After they fixed it, they turned it on and stared in amazement as the boy drew picture after picture. Who made this amazing automaton? They never knew until they saw the boy write a poem in french.
 At the bottom of the poem, in french, it said, "Written by the automaton of Maillardet"

 Henri Maillardet was around in the 1700's. He was a Swiss clockmaker and made amazing automatons. The automaton boy is still around today. It is on display at the Franklin Institute in Philadelphia
This is the drawing automaton boy. It's probably how Hugo was thought of.
/\/\/\/\/\/\/\/\/\/\/\/\/\/\/\/\/\/\/\/\/\/\/\/\/\/\/\/\/\/\/\/\/\/\/\/\/\/\/\/\/\/\/\/\/\/\/\/\/\/\/\/\/\/\/\/\/\/\/\/\/\/\/\/\/\/\/\/\/\/\/\/\/\

I hope you enjoyed this post, if you did please like and comment. In the next post I'll have a new tinker crate. Bye guys! <3
/\/\/\/\/\/\/\/\/\/\/\/\/\/\/\/\/\/\/\/\/\/\/\/\/\/\/\/\/\/\/\/\/\/\/\/\/\/\/\/\/\/\/\/\/\/\/\/\/\/\/\/\/\/\/\/\/\/\/\/\/\/\/\/\/\/\/\/\/\/\/\/\/\